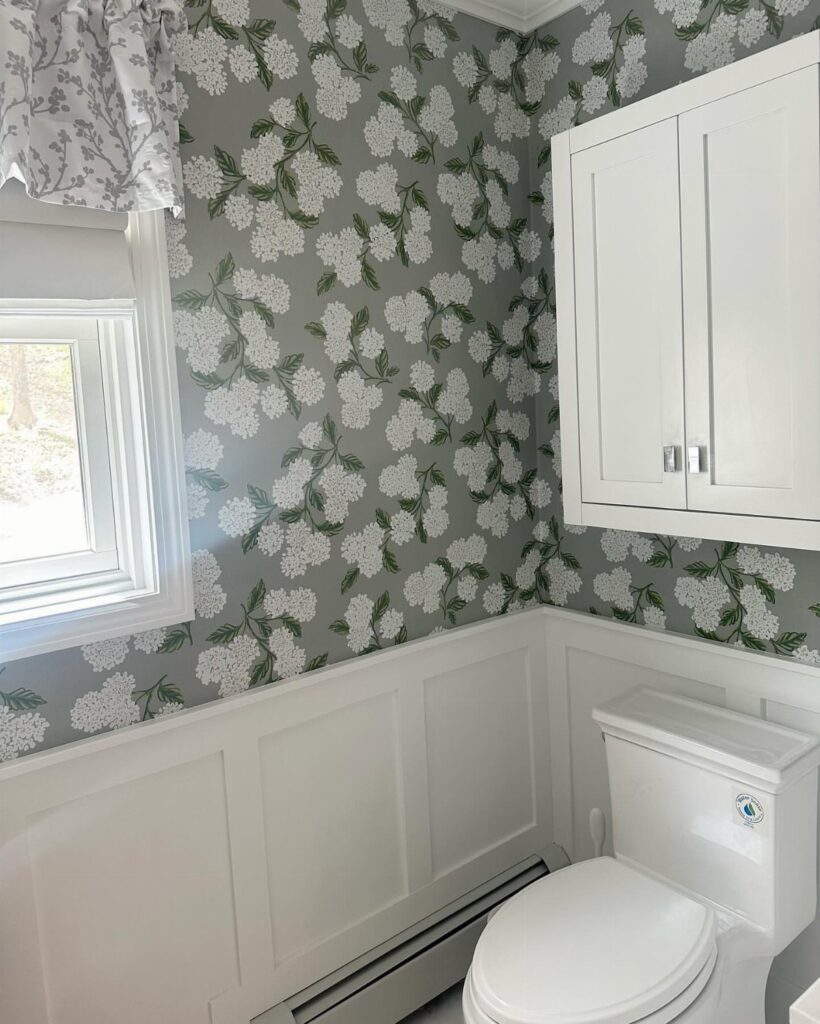
Wainscoting in a bathroom can be a weekend of painted beadboard or raised-panel joinery that eats a long weekend and most of a tool budget.
The deciding factor is how much water actually hits your walls: occasional sink splashes let you use painted beadboard or board and batten, while steam from a glass shower pushes you to tile with a bullnose cap.
I would run a bead of silicone at every edge where wood meets tub or floor, whatever style I chose.
1. Painted Beadboard Wainscoting
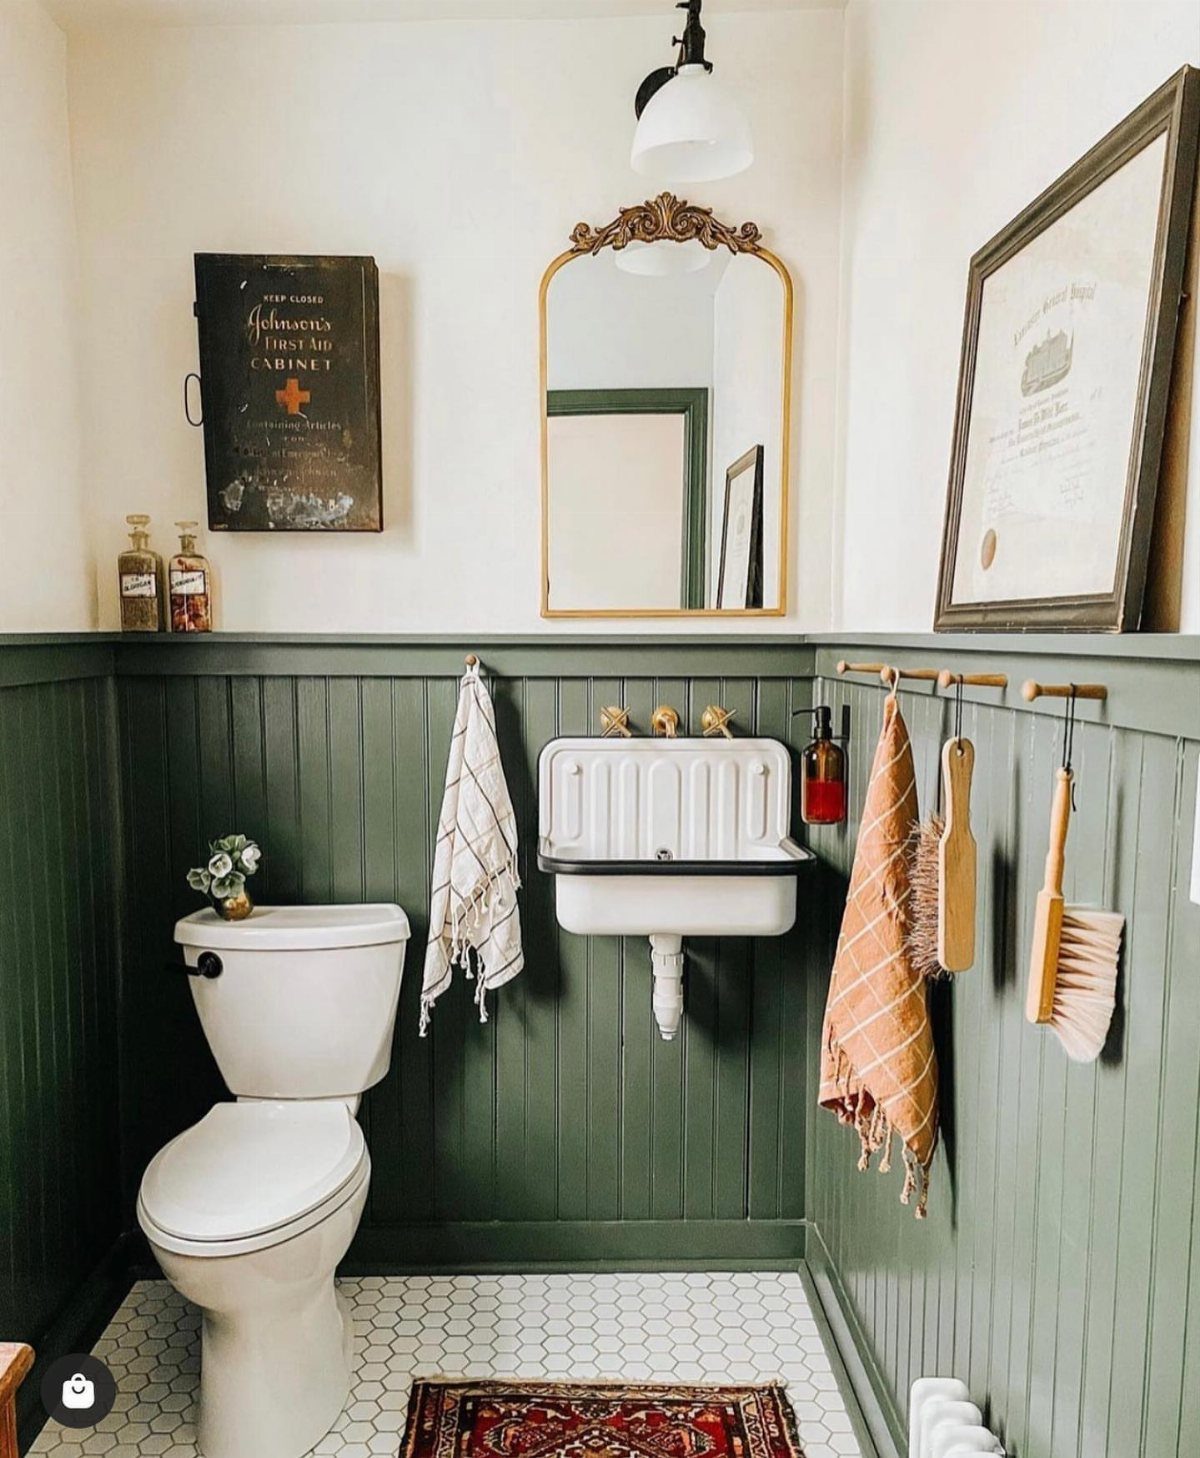
The narrow vertical grooves of beadboard read instantly as bathroom wainscoting, and painting it one color from baseboard to cap rail keeps the look clean rather than busy.
I would start with a moisture-resistant primer on MDF or tongue-and-groove solid wood, then cut in with a brush before rolling; the crevices collect drips if you rush this part.
Running the boards 32 to 42 inches high hits the right proportion for most bathrooms, and if wallpaper is going above, install it before the top trim so you are not cutting against a finished edge.
2. Board and Batten
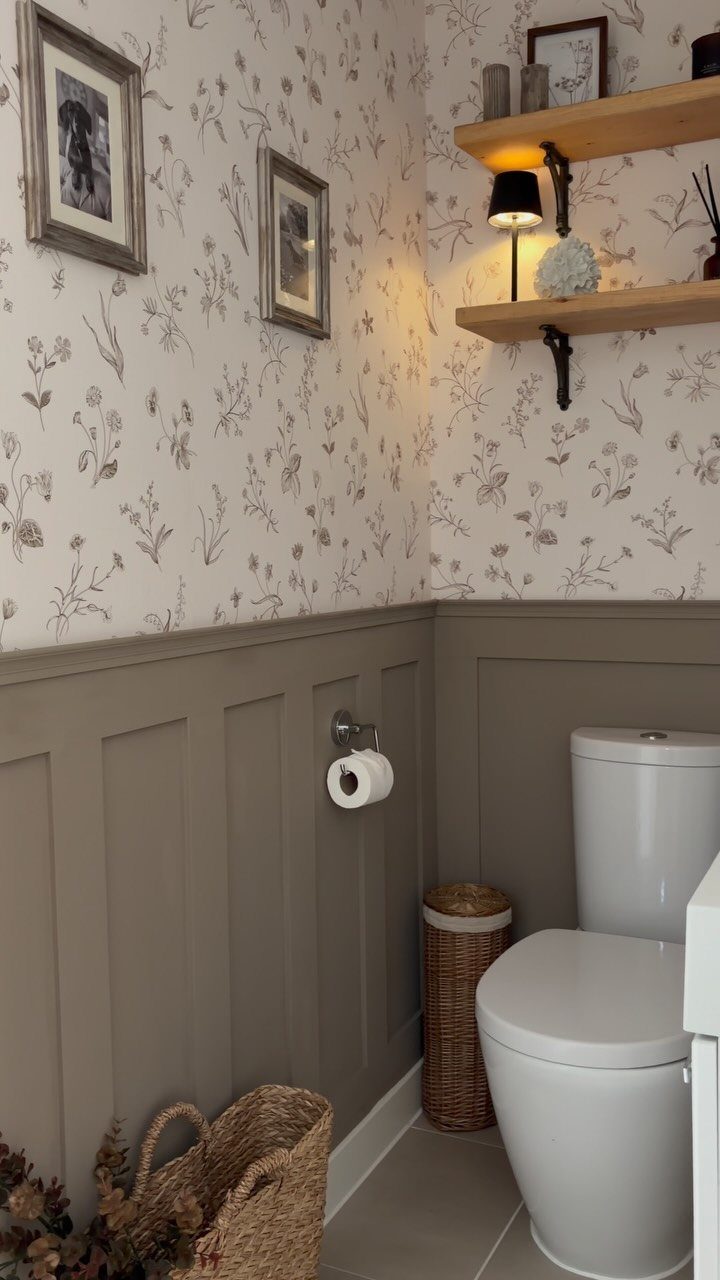
Board and batten trades the constant texture of beadboard for vertical boards with flat wall between them, which reads sharper and more contemporary in a bathroom where you want calm.
I would space the boards evenly for rhythm, set the assembly 42 to 48 inches high, and build from MDF or finger-jointed pine; both take paint well and cost less than solid stock.
The open wall space above the lower rail gives you a natural stopping point, so this one suits renters or first-home owners who want impact without covering every surface.
3. Wainscotting & Wallpaper
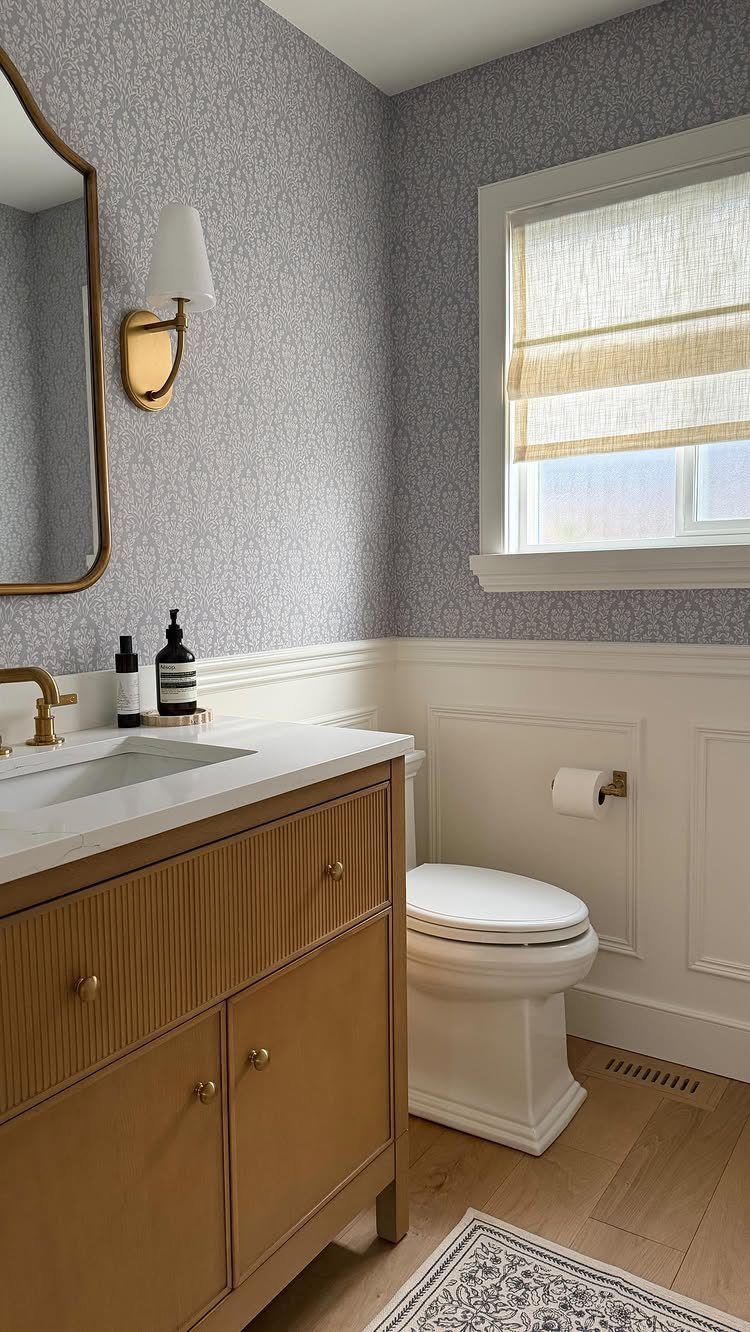
Pairing wainscoting with wallpaper above it is the oldest trick for adding pattern without committing an entire wall to paper in a damp room.
I would hang the wallpaper before attaching the top trim piece, which hides the bottom edge and saves you from cutting freehand against beadboard or battens.
A 1×4 with a header stop makes a clean cap rail if you are building your own, and painting the trim beforehand means only touch-ups after installation.
4. Tile Wainscoting
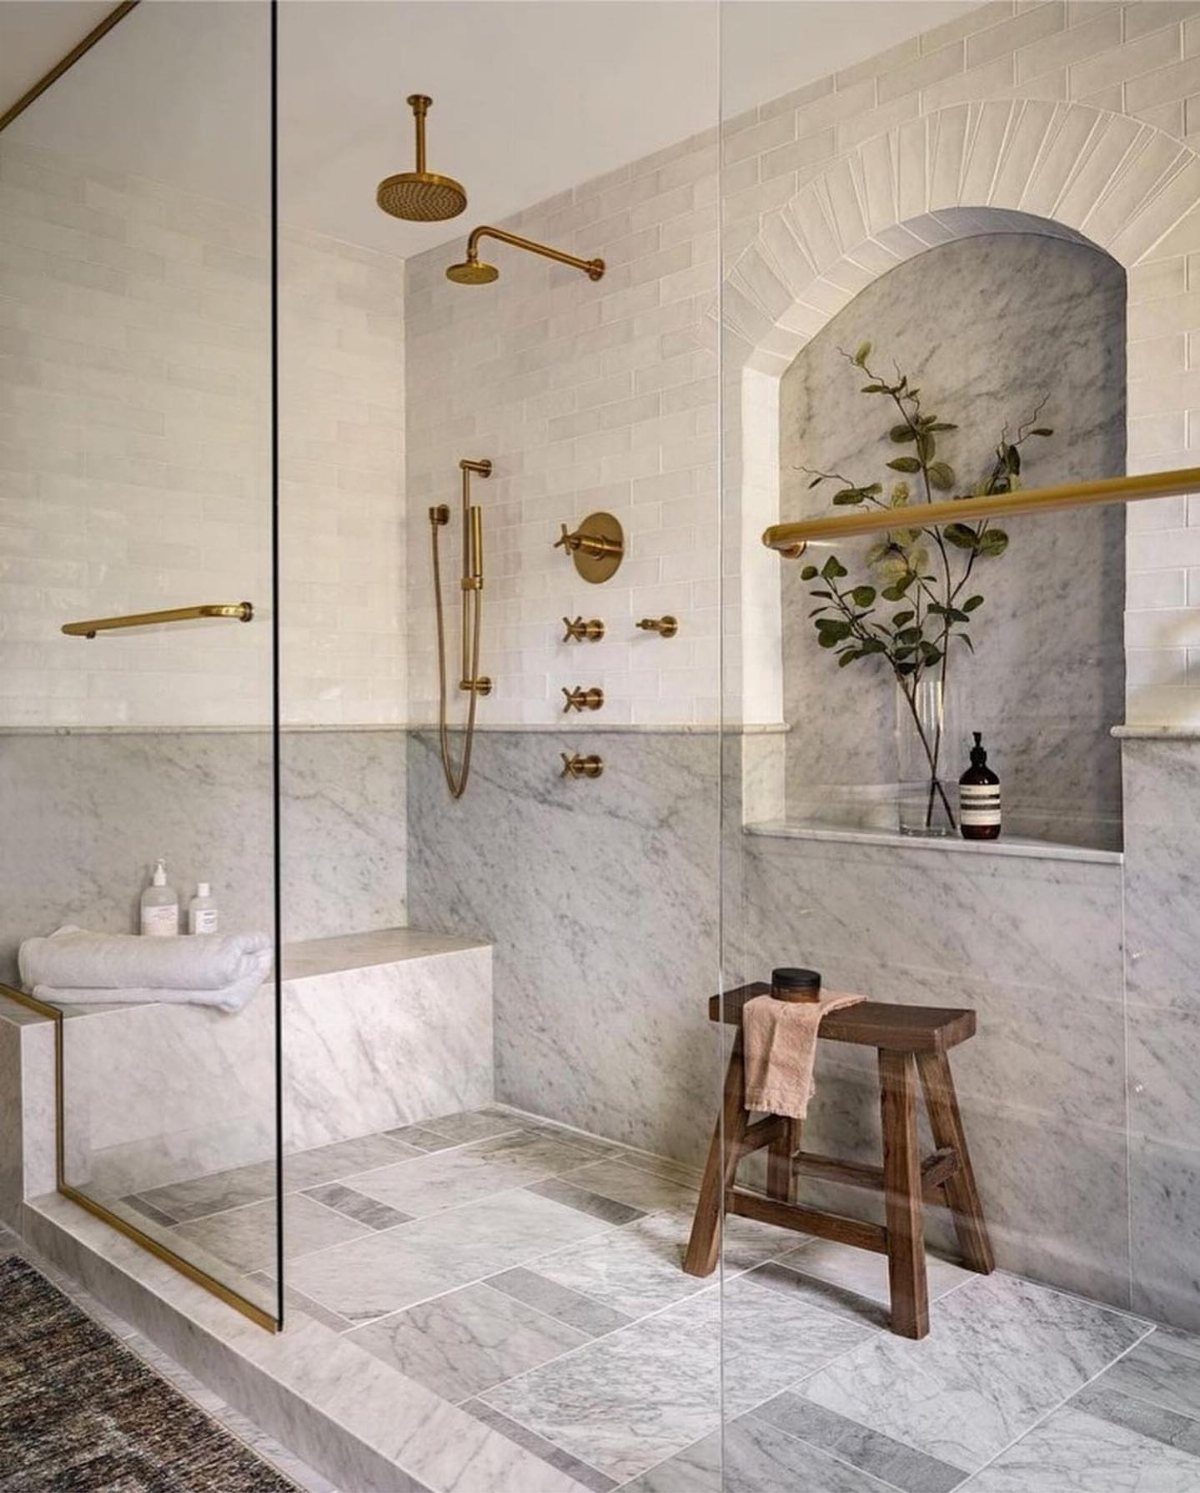
Tile and stone are the only wainscoting options here that shrug off direct water, which matters if your bathroom sees actual steam instead of just occasional splashes.
I would run fired ceramic, porcelain, or natural stone 36 to 48 inches high and finish with a bullnose or pencil tile cap rather than ending abruptly; the cap protects the edge and gives the eye a line to follow.
Marble reads luxurious but needs sealing, porcelain is harder wearing for less, and both install over cement board, not drywall. This is the choice for bathrooms with a glass shower and no curtain to catch spray.
5. Traditional Wainscotting Styles
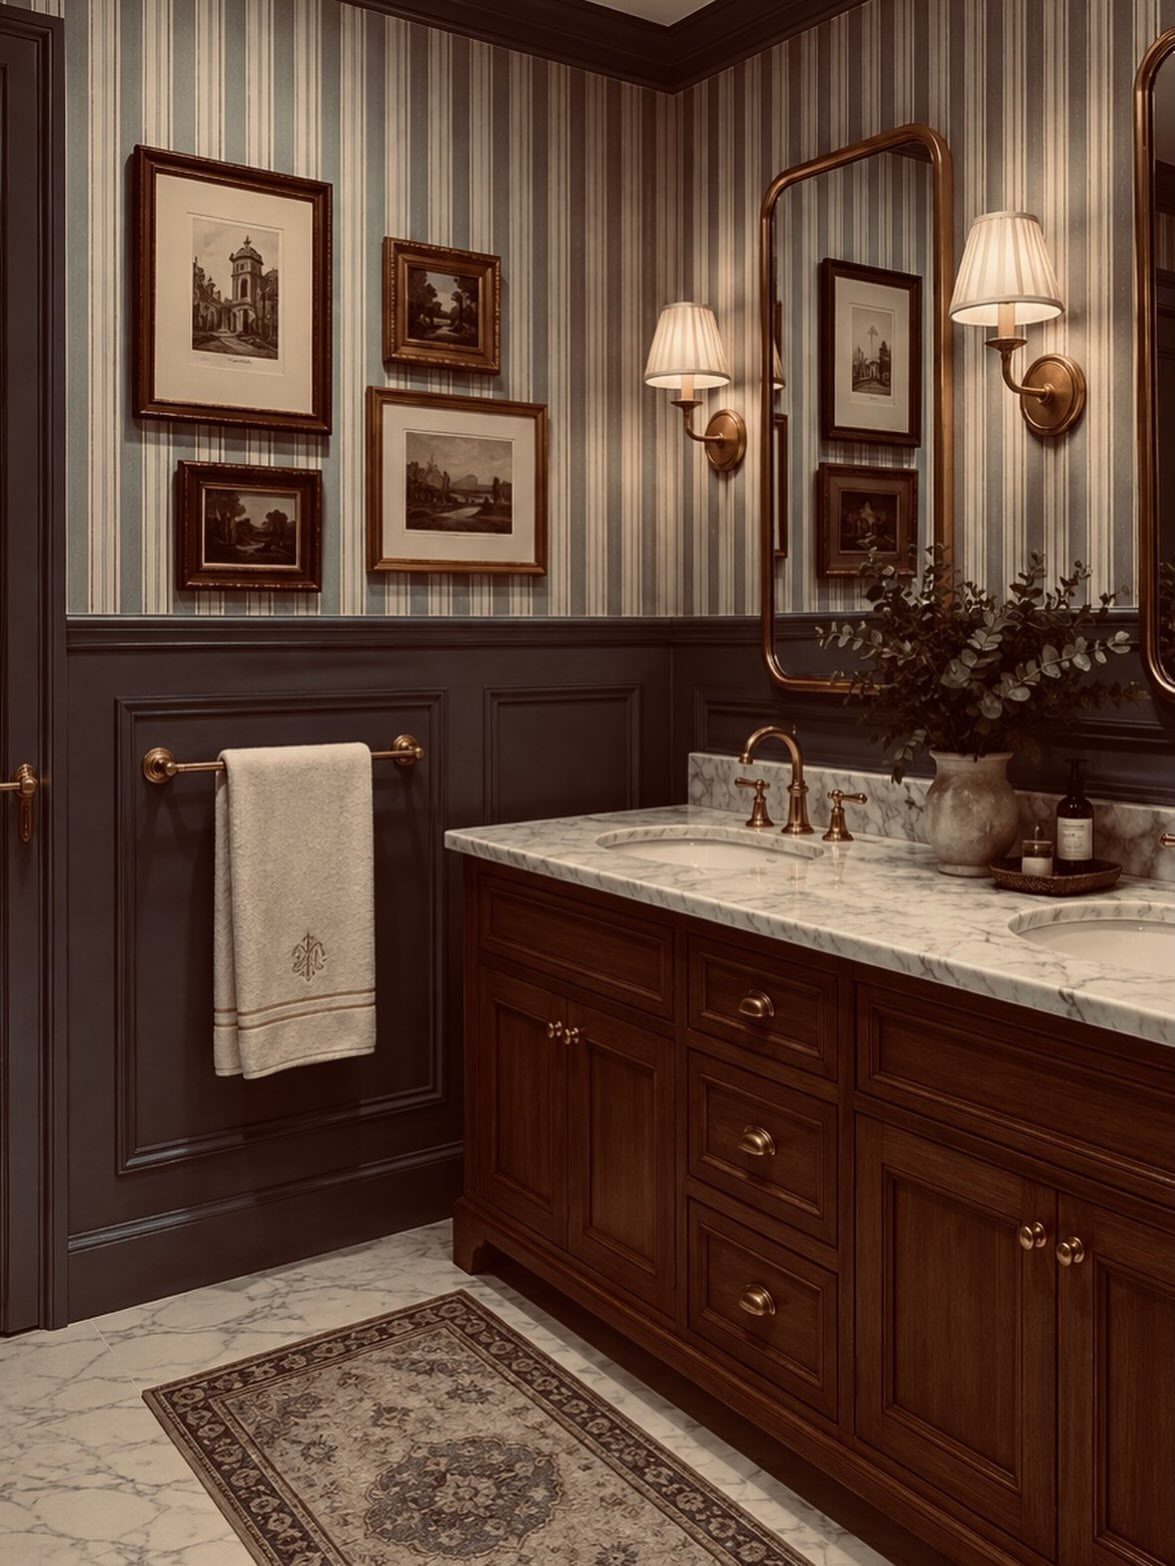
Raised panel wainscoting carries weight that flat alternatives do not; the recessed panels surrounded by molded frames look built in, not applied, which is why it suits bathrooms where you want the feel of an older house.
I would paint the panels in a warm white or soft off-white and run a contrasting color above, the way traditional installs often did, rather than matching everything and losing the architecture.
The detail work takes longer to install and costs more than beadboard, so this one trades budget for permanence; it is worth it in a primary bath you use every morning, less so in a powder room you pass through.
6. Dark Green Picture Frame Wainscoting
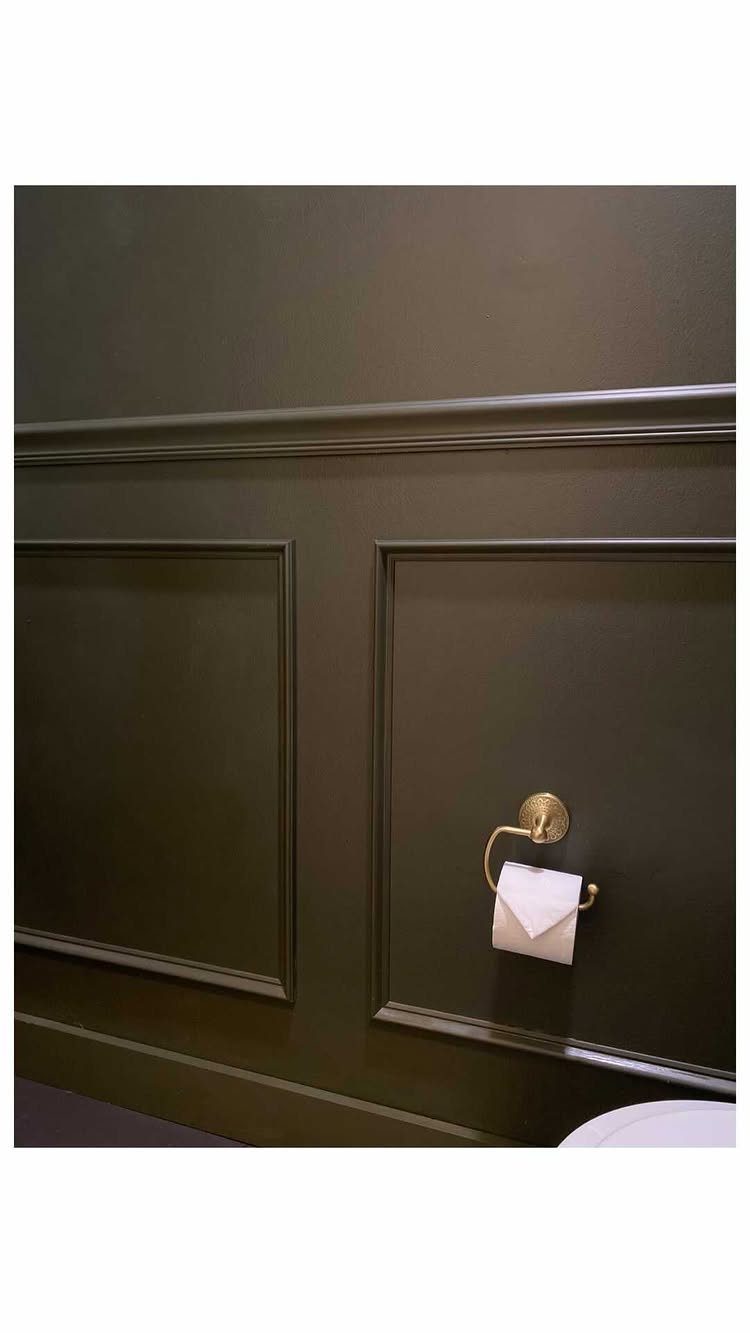
Picture frame molding applied over flat stock gives you the geometry of paneling without the joinery of raised boards, and painting it deep olive or forest green turns a traditional form into something moodier.
I would keep the fixtures brass or antique gold; the warmth keeps dark paint from reading cold in a small room with limited natural light.
The molding itself is just trim pieces mitered at the corners and glued in place, so a patient homeowner can manage this over a weekend for the cost of lumber and a nail gun rental.
This one suits bathrooms with good overhead lighting or white fixtures to balance the depth.
7. Grey Paneled Wainscoting
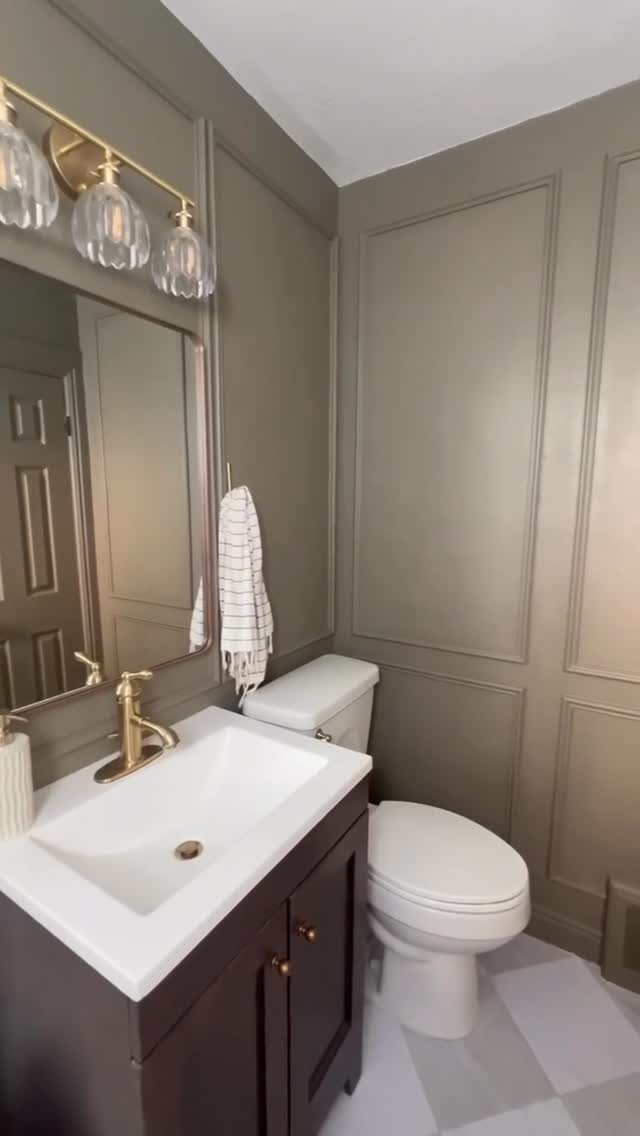
Taupe-grey panels read as warmer than true grey, which keeps a small bathroom from feeling like an office cubicle.
Grey paneling needs something weighty to anchor it: a gold fixture and dark vanity keep it from floating away and looking unfinished.
I’d run the paneling to standard chair-rail height and seal every edge with silicone where it meets the tub or floor.
MDF panels work here if you prime every face; in a bathroom, the back side matters as much as the front.
This suits renters who can paint but cannot re-tile. The grey hides water spots better than white, and a single weekend covers it.
8. White Wainscoting with Painted Walls
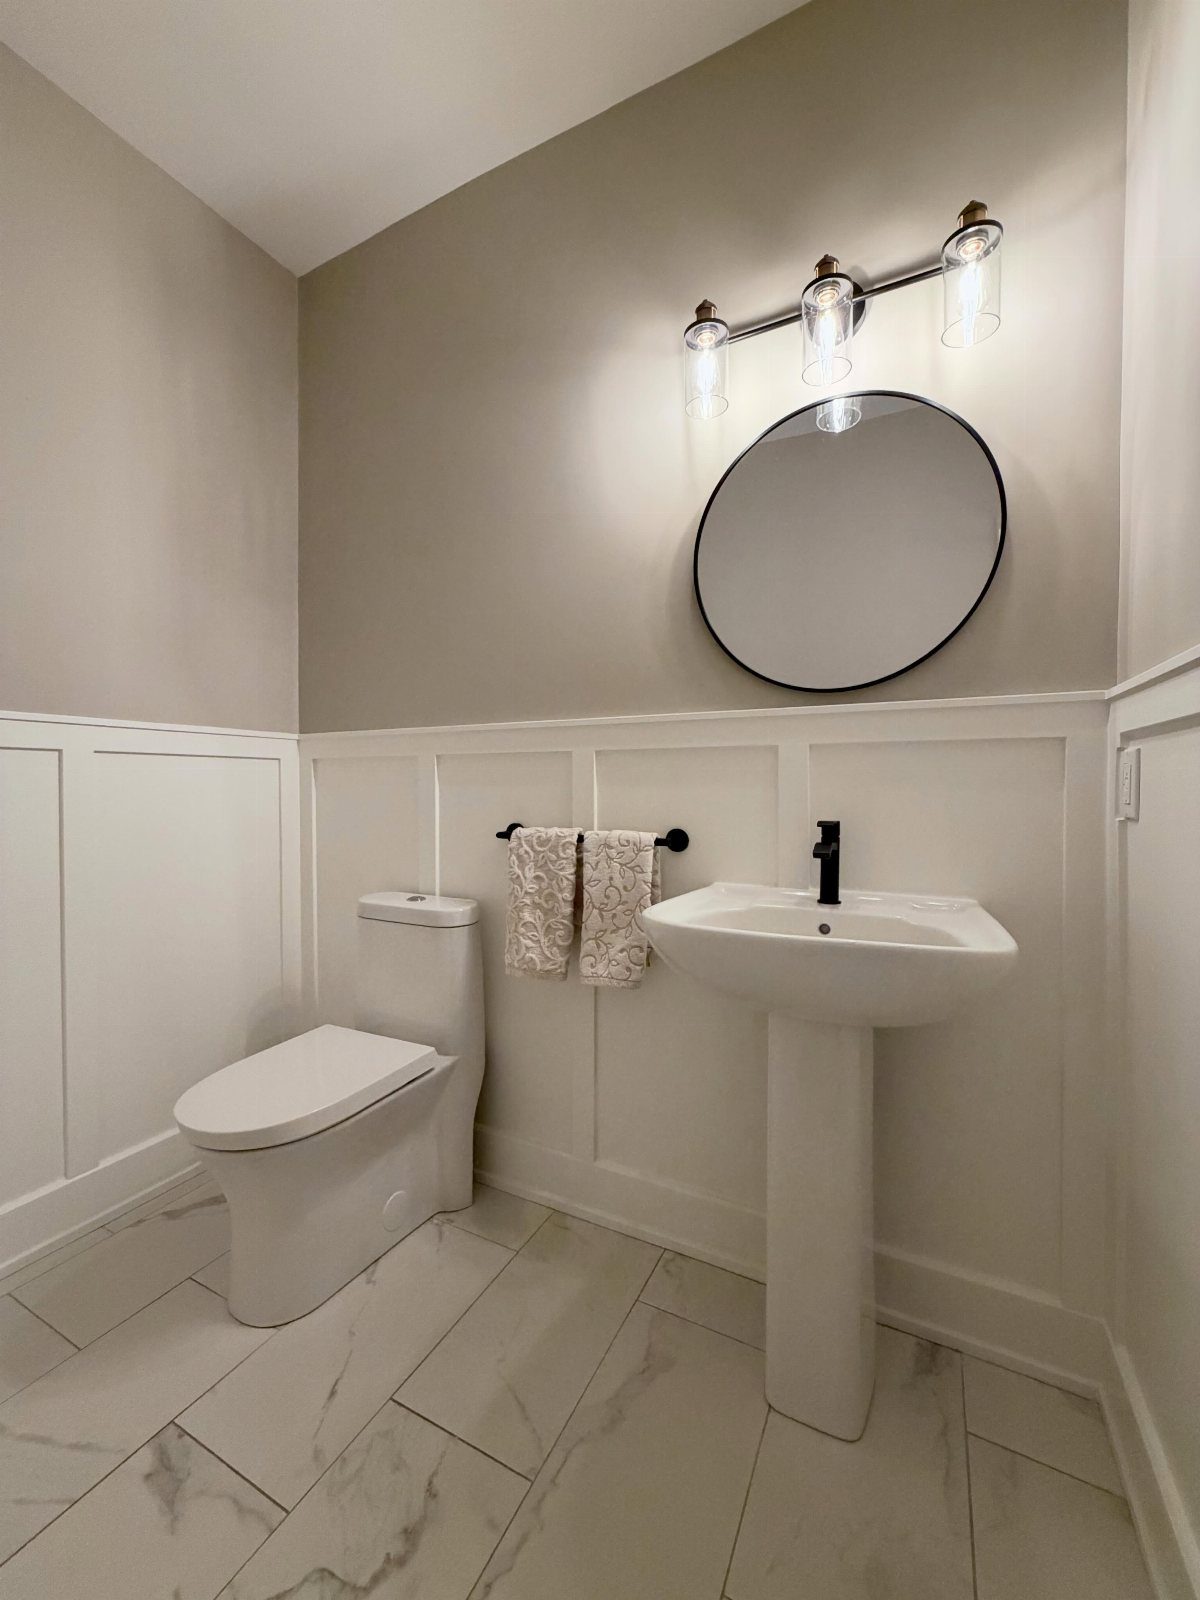
White wainscoting with painted upper walls is the oldest trick for making a bathroom feel finished without finishing your bank account. Board-and-batten below a warm neutral reads as intentional rather than leftover.
What makes it work is how the two surfaces meet. Paint the upper wall first, then install the wainscoting last; any scuffs land on boards you will caulk and touch up anyway.
I cut my battens from 1×3 pine and spaced them to hit studs without toggling every piece.
A pedestal sink keeps the look light, but this works under a vanity too. The white lower half forgives splashes, and the painted upper half lets you change mood without touching the woodwork.
9. Dark Teal Wainscoting
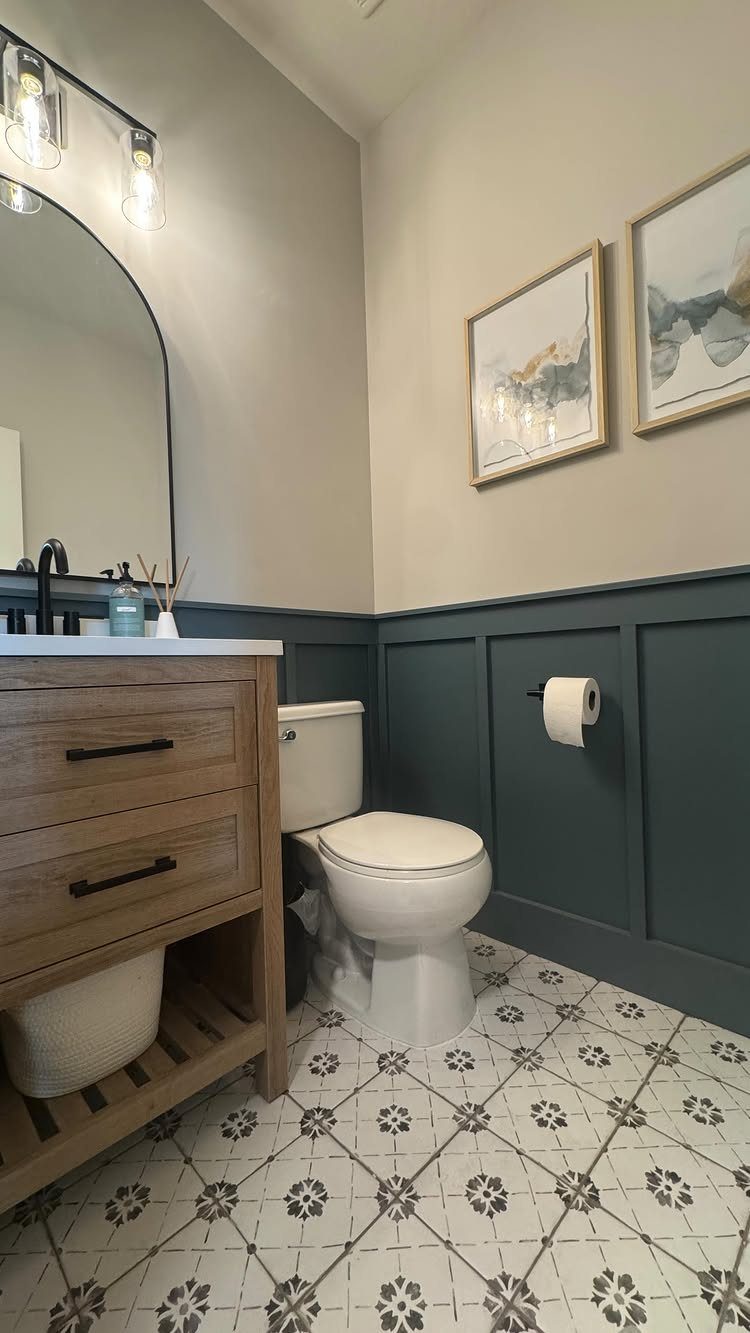
Dark teal wainscoting risks reading as nautical kitsch if you pair it with chrome and rope. Matte black hardware and a wood vanity with no visible grain pattern add mass and warmth without competing.
I painted my own panels in a deep teal with gray undertone, not green, and I used semigloss for the sheen. Flat paint in a bathroom gathers mildew; high-gloss shows every ripple in old walls.
Semigloss splits the difference.
Without it, the teal would pool and flatten; with it, the color feels grounded. I’d put this in a powder room where guests see it briefly and you see it daily and still smile.
10. Blue-Grey Vertical Panel Wainscoting
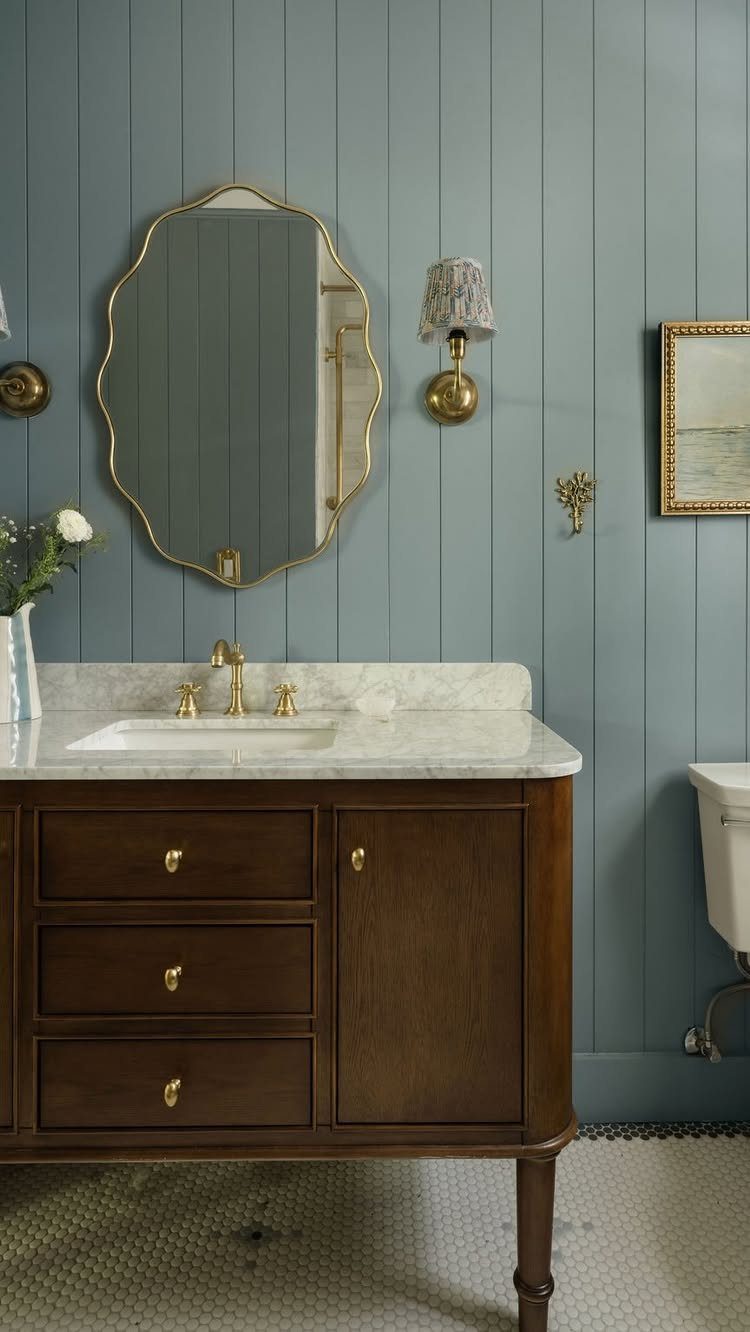
Vertical slats draw the eye up, which flatters a bathroom with standard ceilings. This blue-grey sits between slate and denim, a tone that shifts with the light and hides hard-water stains better than pure blue.
These are individual boards, not a sheet product, so each gap needs spacing consistent to the width of a nickel.
I clamp a scrap block to my baseboard as a stop and work left to right; without the stop, the slats wander and the error compounds.
Brass fixtures warm the cool tone. This trades away the speed of beadboard sheets for a custom look that reads as built-in, not applied.
A versatile pink, like Fruit Shake 2088-60, shown here, on bathroom wainscotting will help start your day on a positive note and give you an oasis to relax in when you return.
11. Cream Wainscoting Panels
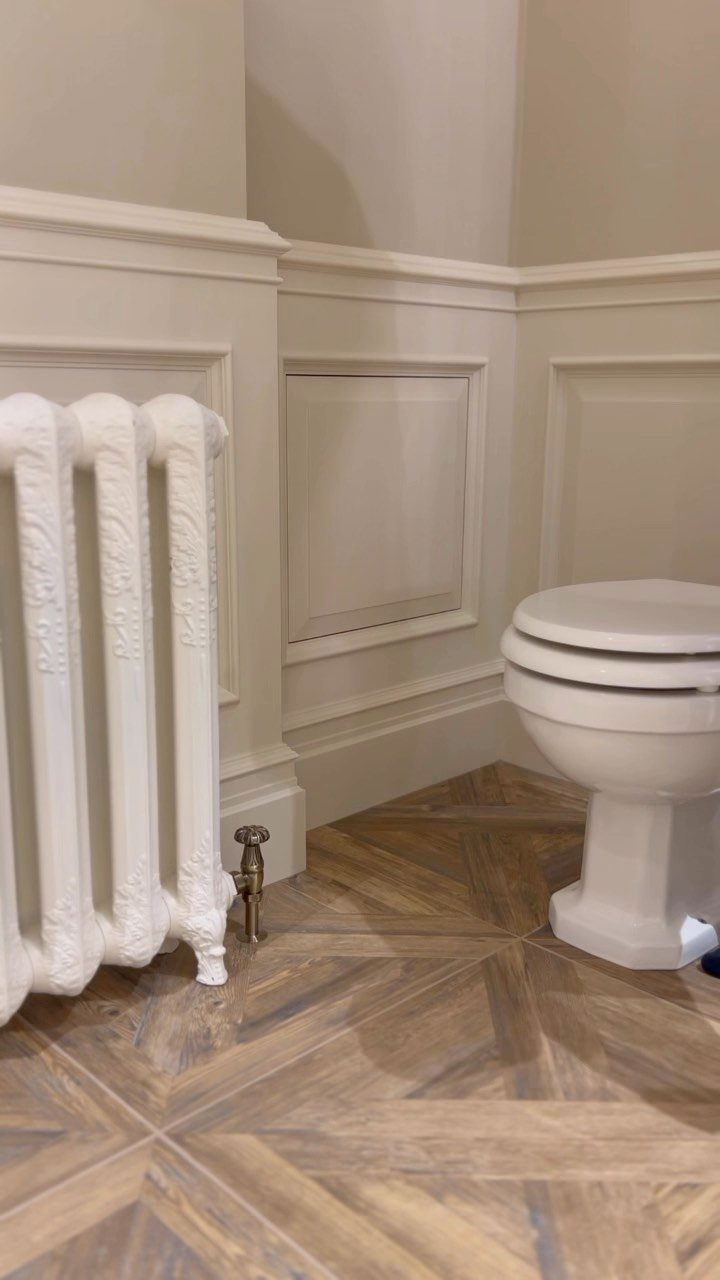
Cream reads as aged white, the color of old houses where paint has softened over decades. Wainscoting that shares tone with the radiator and toilet keeps everything quiet; the floor carries the pattern instead.
I would not attempt cream in a bathroom with poor light. It turns to dirty yellow in shadows, and no bulb fixes that.
North-facing window or heavy overhang, choose white; south or west light, cream has the warmth that makes a rental feel owned.
The paneled style here is raised-panel, the most formal of the traditional types. It costs more in material and in time, but the shadow lines repay both when you are standing at the sink half-awake and notice them anyway.
Benefits of Bathroom Wainscoting
The lower half of the wall takes the splashes and scuffs that happen in any working bathroom, and replacing or refinishing paneling beats patching drywall after damage.
For a house you might sell, buyers read paneling as finished detail rather than something left undone, which translates to perceived value even if the dollar return is modest.
Existing walls with uneven texture or old repair patches disappear behind boards, and the visual weight at the bottom anchors the room in a way that bare walls do not.
Choosing Materials
PVC shrugs off water entirely and asks almost nothing after installation, though it reads as plastic up close and some paints struggle to bond without specialty primer.
Solid wood gives the grain and warmth that factory products cannot replicate, yet it moves with humidity and needs careful sealing at every end grain surface to keep from warping.
Tile belongs where water hits directly, which is why it works behind a glass shower but can feel cold and hard in a powder room where you want softness.
Poplar resists moisture better than MDF for baseboards specifically, since the floor is where water pools and stands longest.
Design Considerations
Lay out the pattern with pencil on the wall before cutting anything; the marks cost nothing and show you where symmetry lands against doors, windows and fixtures.
Take cues from existing trim in the house so the bathroom does not read as a separate project that happened later.
Raised or recessed panels cast shadows that flat sheet goods cannot duplicate, and that depth carries formality that works across traditional to transitional rooms.
Custom panels match existing millwork exactly, which matters when the hallway outside already has established profiles and you want the bathroom to belong to the same house rather than compete with it.
Painting Wainscoting
Wood filler every nail hole and sand flush before primer touches the surface; bumps and dimples telegraph through gloss finishes worse than through flat.
A sprayer lays down the even coat that detailed wainscoting needs, though masking and ventilation take time that a brush does not.
Prime every face, back and edge before the finish coat; skipping this step is how painted wainscoting fails early in wet spaces, with the finish lifting from sealed surfaces while the back side drinks humidity and swells.
Frequently Asked Questions
Can you do wainscoting in a bathroom?
Yes, and it is one of the most practical places for it. The lower half of bathroom walls takes the worst of splashes and steam, so covering that zone with beadboard, board and batten, or tile protects the drywall underneath.
Any wood product in a bathroom needs moisture-resistant primer, and every edge where the wainscoting meets the tub or floor wants a bead of silicone to keep water from sneaking in.
What is the golden rule for wainscoting?
The traditional guide is one-third of the wall height, though I find 32 to 42 inches works better for most bathrooms than a strict fraction.
In a room with standard 8-foot ceilings, one-third lands at 32 inches, which is on the low side for a space where you want the protection to reach past splash height.